Having tried all CD options, eventually settling on flats,and then experimenting with many different folding techniques... I finally have a favorite flat folding option I would like to share with you.
The folding style is the kite fold, with a bit of a variation. The variation is that I use two flats together for added absorbancy.
I took pictures of specific small steps to help you get a good tight fit that eluded me when I was first putting flats on- and finding them falling off or drooping later.
The double kite fold: Using one GMD birdseye flat, and one flour sack towel
Spread birdseye flat out as a diamond shape in front of you. (I hate that these flats were stained, but I promise they are clean! Not many bright sunshine filled days here in the Pacific NW winter)
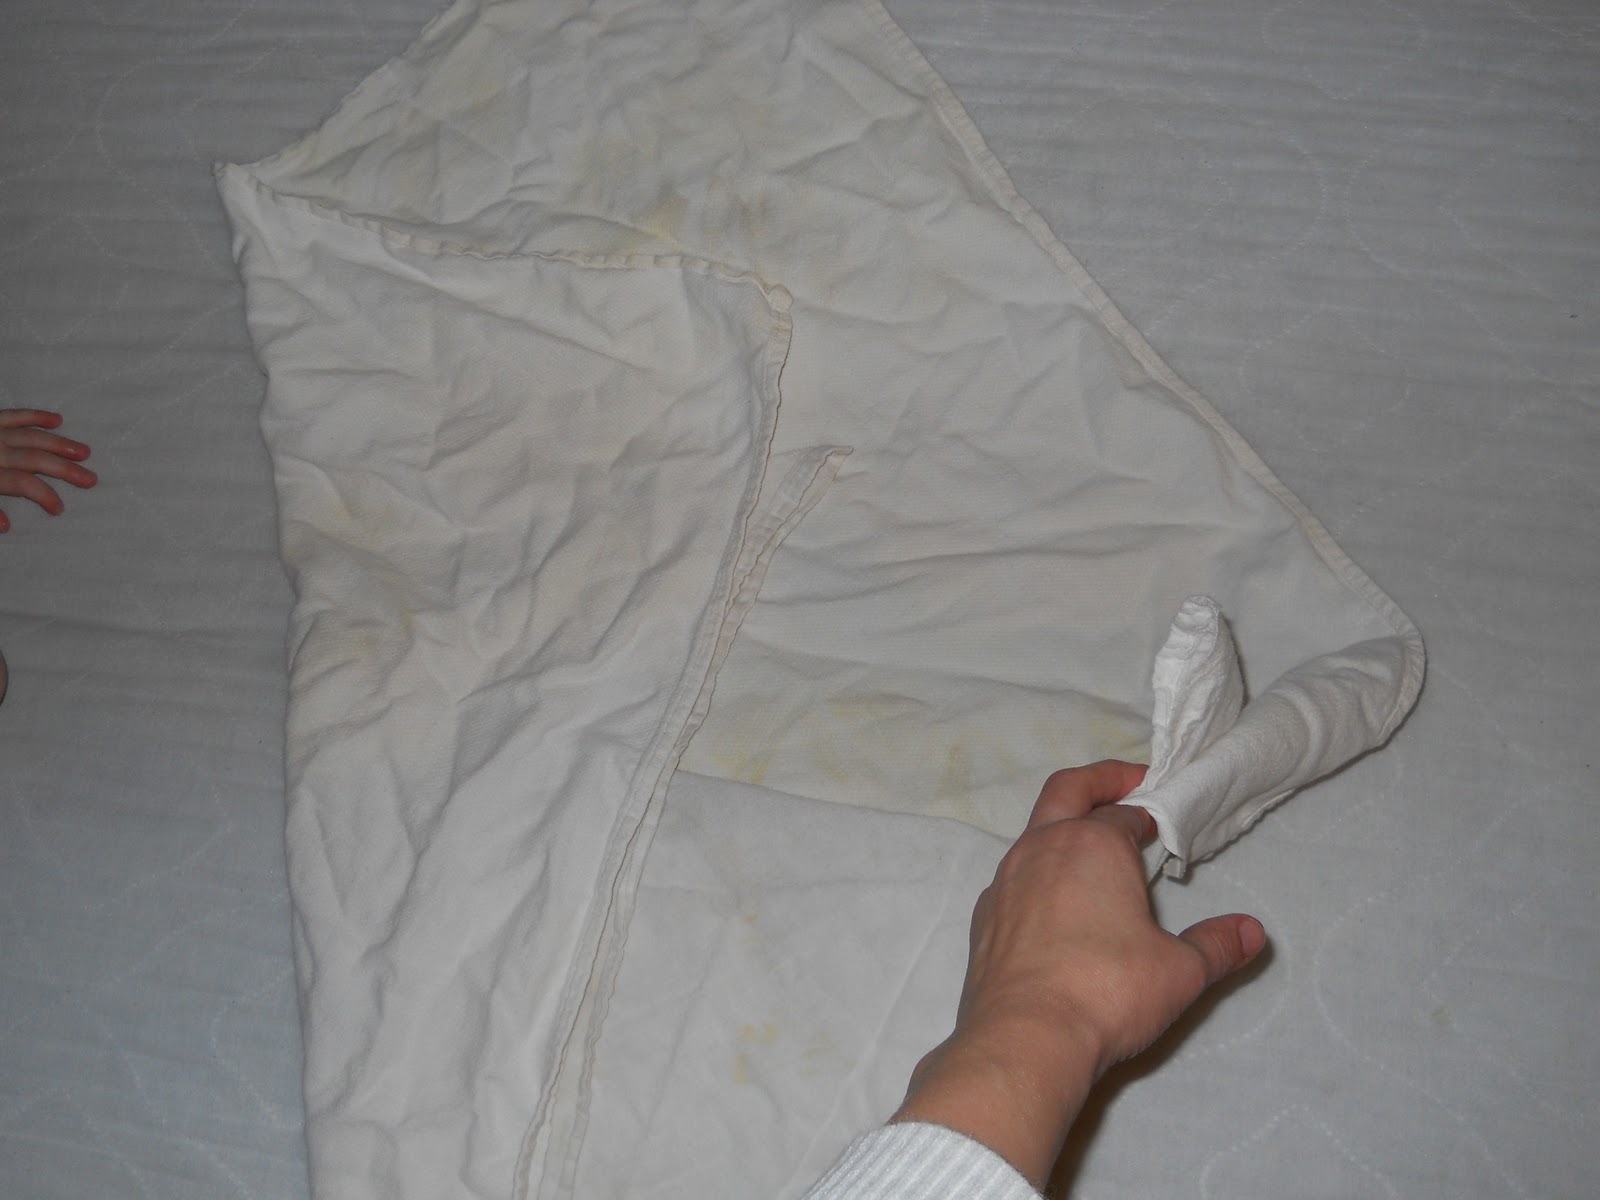
Spread flour sack towel over it in same position. Fold down flour sack towel in half to make a triangle shape on lower half of diamond shape. Folding the second (thinner) layer in half will place more fabric in the wet zone, and not bulking around the waist, where it will also be hard to fasten through all the layers.
Fold one side of diamond shape (all layers) over toward the other side, passing the center of the diamond a little ways. You will notice the folded side's top edge is horizontal.
Fold the other side likewise, in the opposite direction, with the top edge horizontal... or, er, if not exactly horizontal, at least the fold is even.
Now you have a kite shape, hence the name 'kite fold'. ;)
Fold up the bottom of the kite to just past the horizontal line of the previously folded sides.
Fold down the top at the same horizontal line.
The folding is done! You will find that you will fold your kite smaller with a small baby, and larger for a toddler. Very versatile, huh?
Now for putting on baby... (and I realize my little Leah has a rash, sorry)
Place baby on top with the top of the diaper coming up higher than the belly button. Yes, higher than the belly button. You will see that in wrapping it around baby, it has a tendency to 'shrink down' and fit just right. If you wrap it just over the legs, you will not get a good fit around the waist and it will sag and fall down.
Gather the diaper together between the legs (this is hard to show with only one hand), then fold upward snugly. Note: as you gather the diaper between the legs try to fold the wide sides inward in order to keep a defined edge to the diaper instead of just bunching it up. I try to get the sides of the gathered diaper to press into the creases where the legs meet the groin area, this way there is no gap for leakeage.
Now take one of the wings and pull outward to create a snug fit under the bottom while holding the top of the diaper you just folded up firmly in place. (Thanks little Ammon for the extra hand)
Next is the trickiest part for me... while still keeping the diaper wing firmly taught, roll the wing in your hand away from the waist, creating a continued snug fit while you lift your hand over the hip closely and on top of the pelvis.
Hold the top of the diaper and first folded wing with one hand and secure the other wing tight around baby's hip with the other hand. (and thank you Eden for hand help too. You can see I had a helpful audience who were eager to get in the photoshoot).
These wings should be pulled tight, you will notice that they make a taught line straight from where they curve over the hip.
Pin the diaper in place. ***If your baby has wet or runny poo, I highly recommend using the three pin method, which I will show below. I started pinning diapers with three pins a couple years ago with my last toddler which had loose stool. Make sure one hand is behind the layers to protect baby from being stabbed. If the pin doesn't slide easily, run it through your hair, which always works for me.
Straighten out the top of the diaper at your baby's belly. It might have become bunched and will be more comforatable smoothed out. You will notice the top of the diaper sticks up slightly above where the side wings are pinned in place. I found this keeps the diaper from 'rolling in' toward the belly which causes rubbing on baby's sensitive skin, and also helps keep the under sides of the diaper from drooping down. Again, if you get wing droop, use the three pin method- a no fail option.
Last, I tuck the edges of the diaper around the thigh up and in to provide greater comfort and mobility. Otherwise they can rub the top of the legs.
Here are some pictures of the fit: